Using CreateML#
Background#
Due to business needs, we want to identify the quantity or type of specified objects in photos taken. However, there are no pre-trained models for these objects available online, so we need to start from scratch. Therefore, we researched Apple's CreateML implementation, and the specific operations are as follows:
The requirement is: to identify the quantity of specified objects in photos taken, and there are several implementation options:
- Use a third-party platform to train data, generate models, and provide them for frontend use.
- Build your own platform to train data, generate models, and provide them for frontend use.
- Use Apple's CreateML tool to train data, generate models, for iOS use or convert to other models.
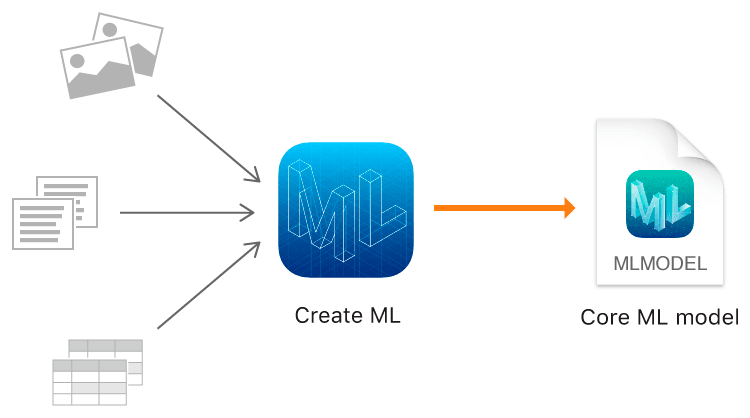
Comparing these options, we can see that using Apple's CreateML tool can save the process of building a platform. Let's see how to use CreateML.
The overall process of using CreateML is:
- Have a large number of samples.
- Annotate all samples.
- Train the model using these samples.
- Validate the model's recognition rate.
- Test the model's effectiveness.
- Export the model for use.
The requirement is to identify the quantity of specified objects in photos taken, so for me, the samples are the photos. Now let's see how to generate the annotation information required for CreateML training.
Usage#
Sample Photo Annotation#
First, we need a large number of sample photos. Here, due to testing, we selected 20 photos, sourced from Baidu Images... The troublesome part is photo annotation, as Apple's CreateML training requires a specified format of JSON file, as follows:
[
    {
        "image": "image_name.jpg",
        "annotations": [
            {
                "label": "label_name",
                "coordinates": {
                    "x": 133,
                    "y": 240.5,
                    "width": 113.5,
                    "height": 185
                }
            }
        ]
    }
 ]
Therefore, finding a tool that can directly export the JSON format supported by Create ML is particularly important. Here, we refer to Object Detection with Create ML: images and dataset and use roboflow for annotation, as follows:
After logging into roboflow, there will be guided steps to create a workspace, and within the workspace, create a new project. You can also invite users to join the same workspace, as shown below:

Click Create Project, enter the project name, select the project License, choose the project's functionality, and enter the name of the object to be labeled, as shown below:

Then import photos, for example, download a dozen photos of steel pipes from the internet to train the recognition of steel pipes (there should usually be many more photos; the more samples, the more accurate the trained model, but this is just for demonstration, so the selected photos are few); note that after the photos are uploaded, do not click the Finish Uploading button in the upper right corner, as there are no annotations yet. Note All Images(18), Annotated(0), indicating that none have been annotated.

Double-click any photo to enter the annotation page:
- On the annotation page, first select the annotation tool on the far right, which defaults to rectangular box annotation;
- Then select the annotation range; note that when using curve annotation, the starting and ending points must be closed;
- Then in the pop-up Annotation Editor box, enter the label to be marked, and click save;
- If there are multiple labels, repeat the above process;
- After all labels are completed, click the return button on the left;

After all photos are annotated, click Finish Uploading, and a prompt box will pop up asking how to allocate photos to Train, Valid, and Test. By default, all photos are used for Train, as shown below:


Click Continue to proceed to the next step. You can see that steps 1 and 2 are completed. If you want to edit the above two steps, you can hover over the right side of the corresponding module to see the edit button; currently, in step 3, Auto-Orient means Discard EXIF rotations and standardize pixel ordering. If not needed, this step can be deleted; Resize is to resize the photos. You can also add a Preprocessing Step. The purpose of this preprocessing step is to save final training time.

Click Continue to proceed to step 4, which aims to create new training examples for the model to learn by generating enhanced versions of each image in the training set. If not needed, you can directly click Continue to proceed to the next step.

The final step is to generate results. Click Generate and wait for the results to appear. The results are as follows:
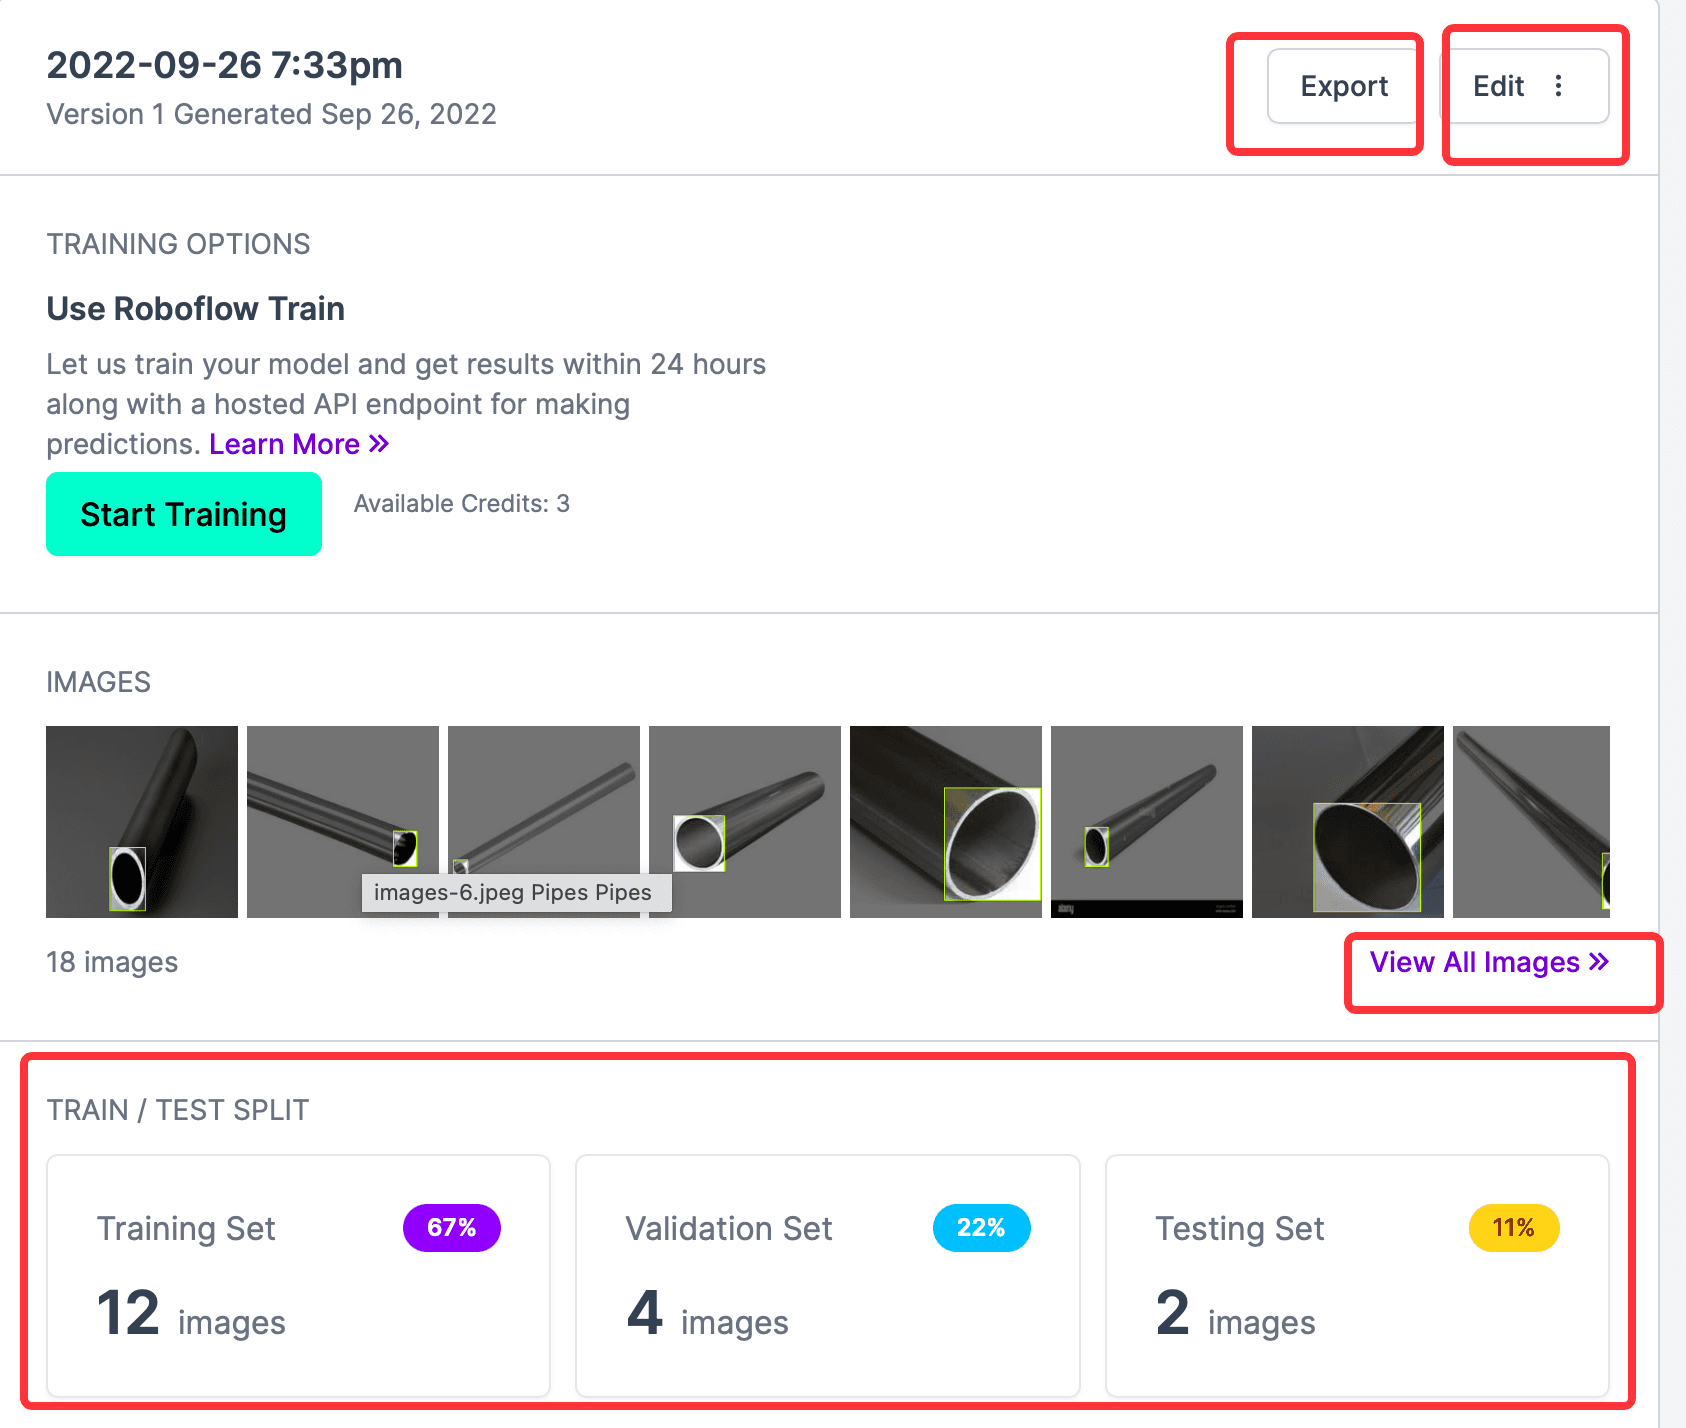
From the above image, you can see the number of all annotated photos, Train, Validation, and Test, and the Start Training button is the online training function provided by the website, which is not needed here; what we need is to export the CreateML type annotation information, so click Export, and in the pop-up window, select the format to export. This website is best for exporting because it supports many formats. Here, select CreateML, then check download zip to computer, and click Continue.

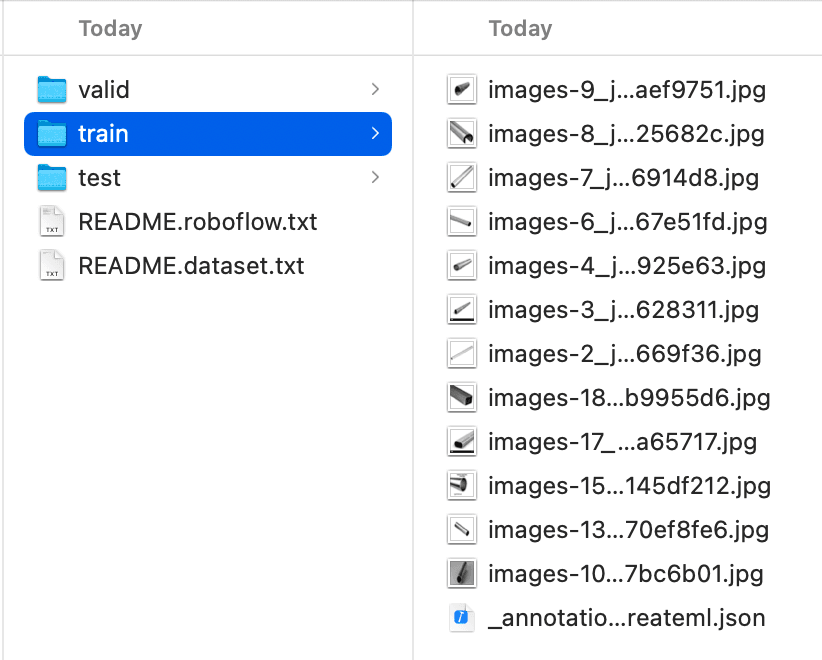
Find the downloaded xxx.createml.zip in Finder, unzip it, and check the folder. The contents are as follows, and you can see that Train, Valid, and Test are all categorized. Check the _annotations.createml.json in the Train folder, and you can see that the format is consistent with what CreateML requires, and it can be used directly.
Using CreateML#
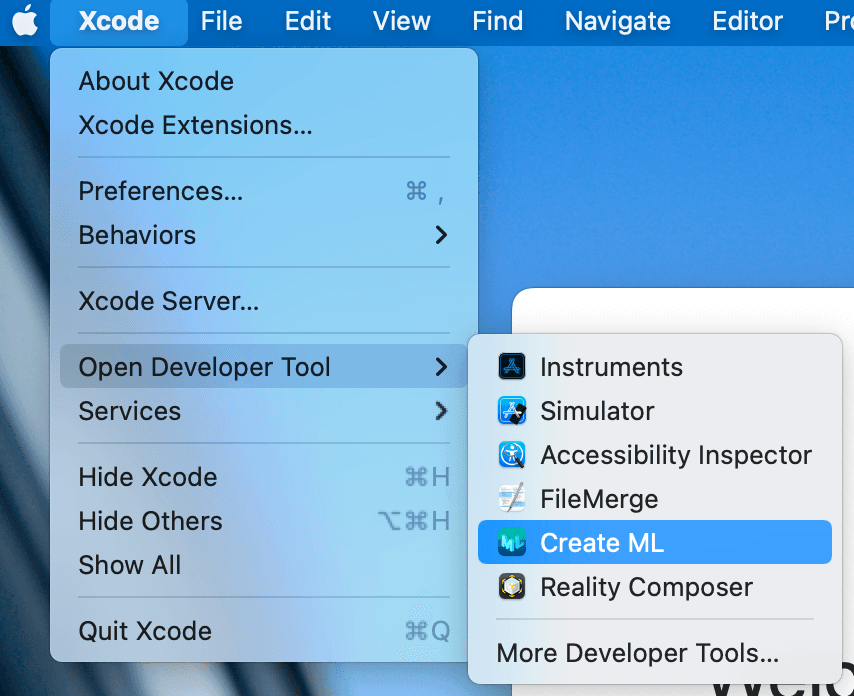
Select Xcode -> Open Developer Tool -> Create ML to open the CreateML tool, as shown below:
Then enter the project selection interface. If there is an existing CreateML project, select it to open; if not, select the folder to save, then click the New Document button in the lower left corner to enter the creation page, as shown below:

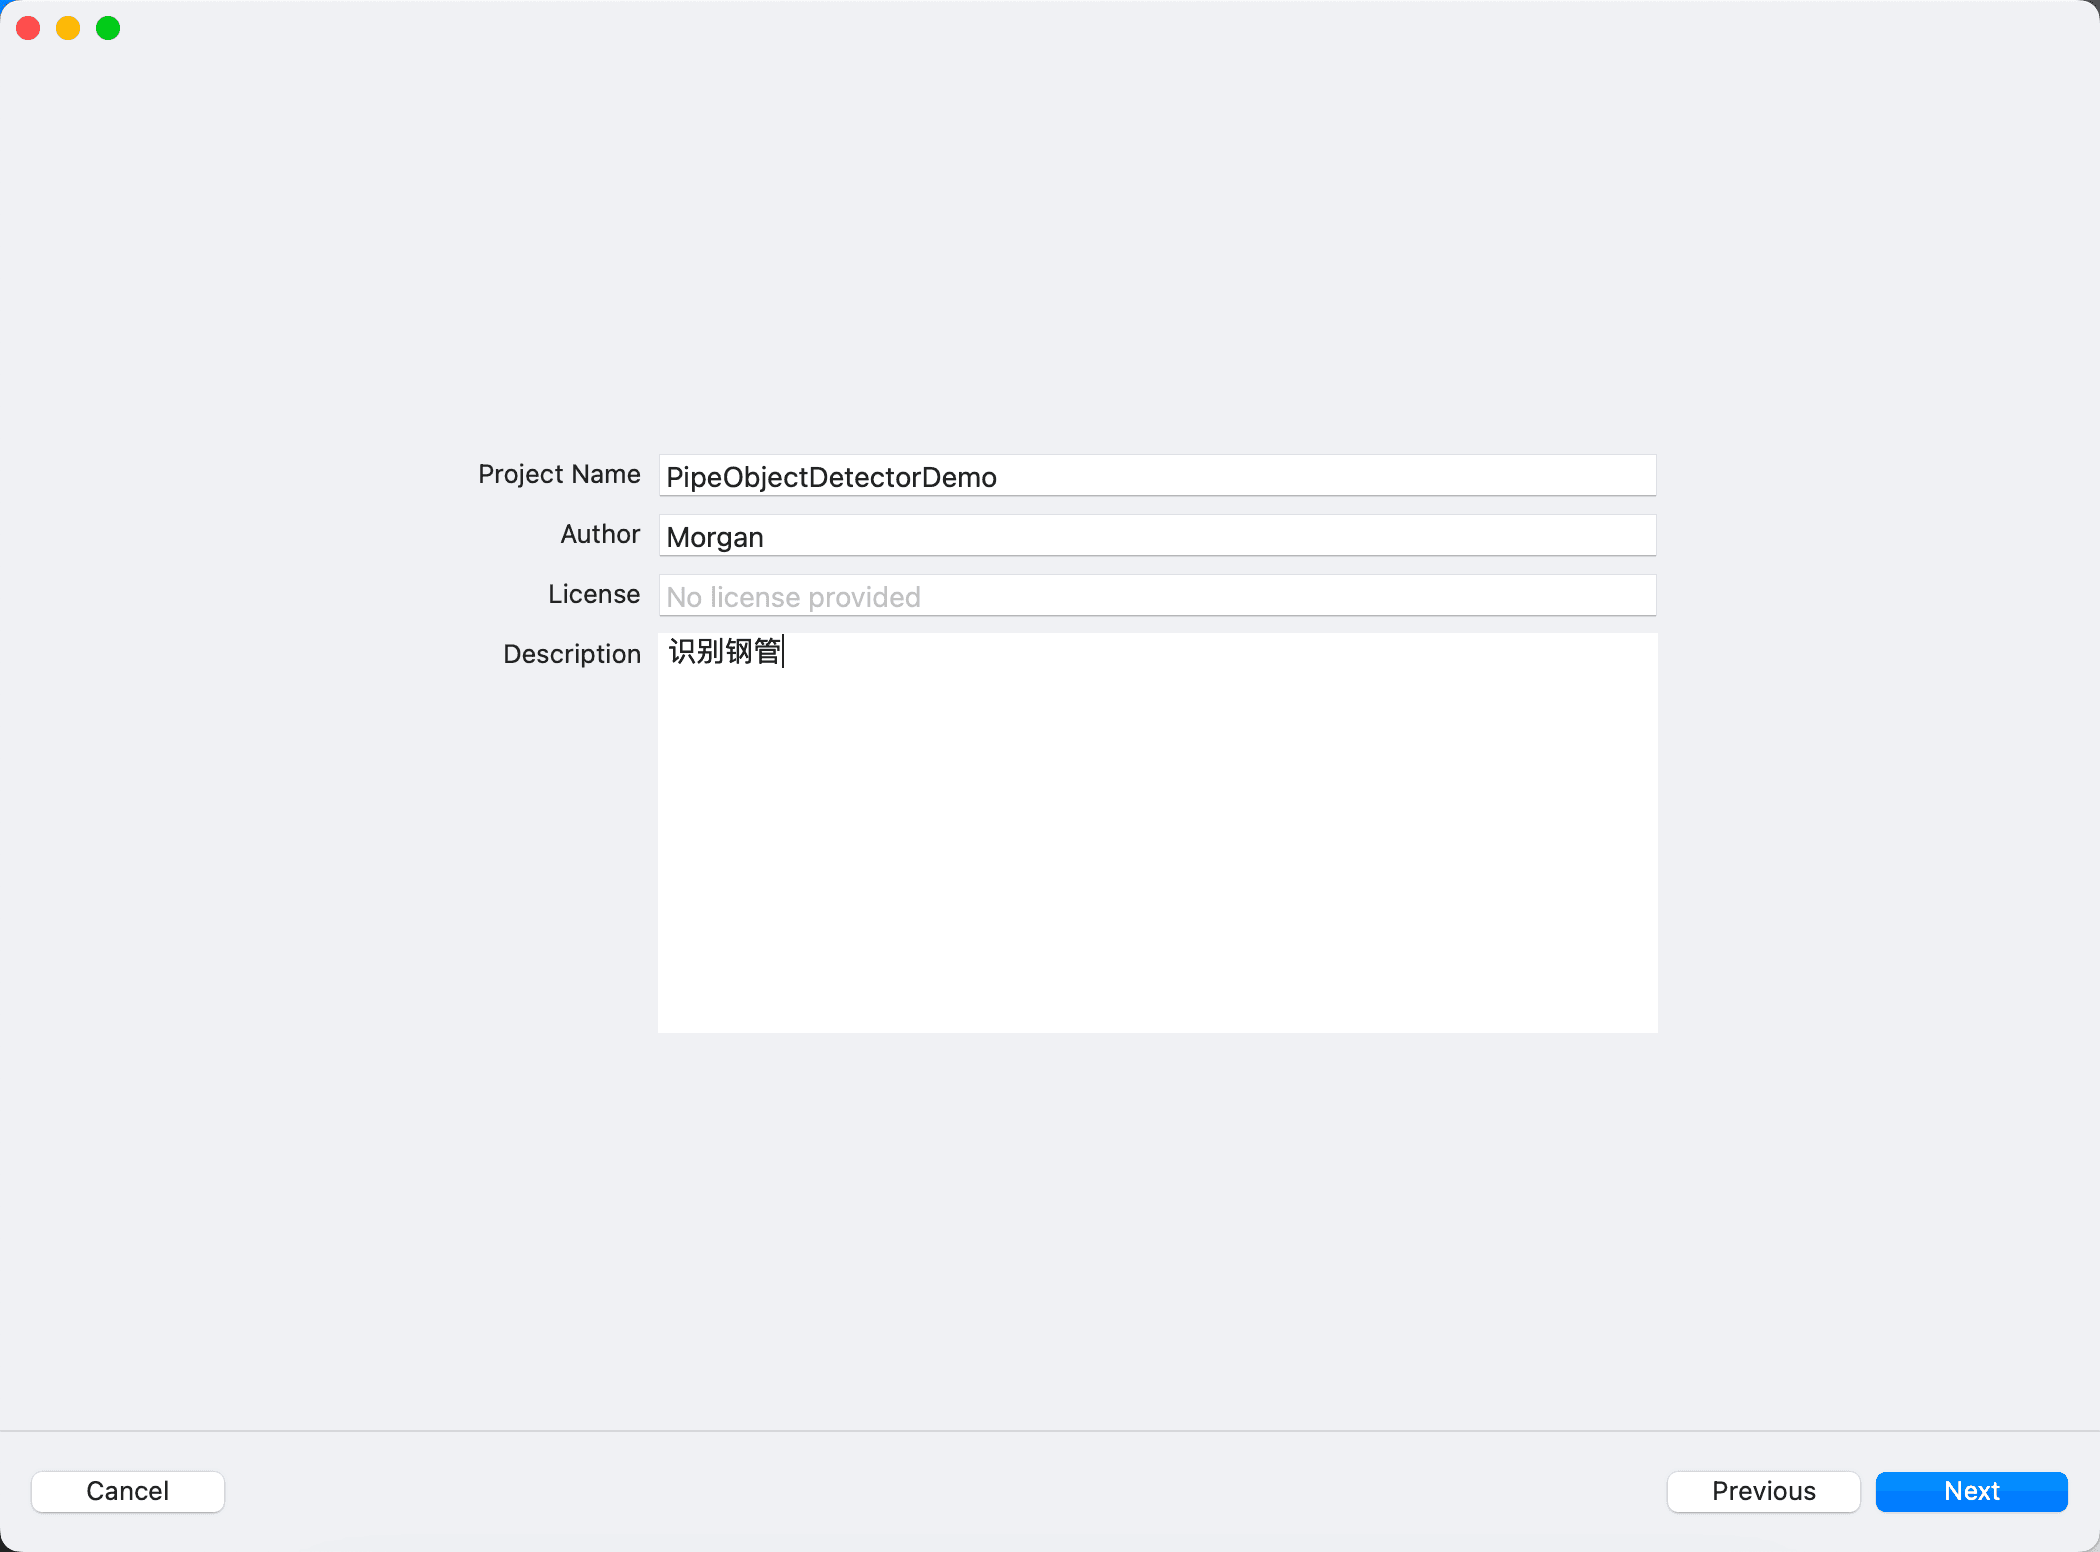
Choose the template to create as needed. Here, select Object Detection, then enter the project name and description, as shown:
Here, a side note: seeing
Text ClassificationandWord Taggingreminds me of SMS filtering apps in stores, which likely use a large amount of spam messages to train a model through CreateML, then import it into the project, and continue to use Core ML to update this model, thus achieving better recognition effects for each individual.
Click next to enter the main interface, as shown in the following image. You can see the following parts:
- The upper middle part with
Setting,Training,Evaluation,Preview,Outputrepresents several steps of CreateML, which can be switched to view. Currently, the latter steps are all empty because there are no training results yet. - The
Trainbutton on the upper left is used to start training after selecting and importing data in the middle partTrainingData. - The Data section can use the contents from the downloaded folder, but first, you need to import the
Trainfile, and after the training results come out, you can continue with the subsequent steps. - Parameters section
- Algorithm is to choose the algorithm. The default
FullNetworkingis based on YOLOv2, and you can chooseTransferLearning, which is related to the number of samples, and the trained model is also smaller. As for what YOLOv2 is, you can refer to this article A Gentle Introduction to Object Recognition With Deep Learning, and after reading, you will have a general understanding of several algorithms in deep learning. Iterationsis the number of training iterations, which is not necessarily better the larger it is, nor can it be too small.Batch Size, the size of the data for each training iteration, the larger the value, the more memory it occupies. Refer to What is batch size in neural network?Grid Size, refer to gridsize, which is how many blocks the YOLO algorithm divides the image into.
- Algorithm is to choose the algorithm. The default

Set the Iterations to 100, keep the rest as default, then click Train, and you will enter the Training step, with the final result as follows:

Then select Testing Data. Since the downloaded annotations only have two data points in Test, you can also use Train as Testing Data. Click Test, and wait for the results to appear, as shown:

The meaning of I/U 50% and Varied I/U on this page can be referenced in CreateML object detection evaluation
I/U means "Intersection over Union". It is a very simple metric which tells you how good the model is at predicting a bounding box of an object. You can read more about I/U in the "Intersection over Union (IoU) for object detection" article at PyImageSearch.
So:
I/U 50% means how many observations have their I/U score over 50%
Varied I/U is an average I/U score for a data set
You can also preview the recognition effect more intuitively. Click to add files and select all steel pipe photos.

Then check each one to see if it can be recognized.

Finally, switch to Output, click Get, and export the model xxx.mlmodel, as shown:

Using the trained model mlmodel#
Create a new project and import the trained model into the project, as shown:

Then import the Vision library, load a photo, and generate VNImageRequestHandler, using the generated handler for recognition. The code is as follows:
class PipeImageDetectorVC: UIViewController {


    // MARK: - properties
    fileprivate var coreMLRequest: VNCoreMLRequest?
    fileprivate var drawingBoxesView: DrawingBoxesView?
    fileprivate var displayImageView: UIImageView = UIImageView()
    fileprivate var randomLoadBtn: UIButton = UIButton(type: .custom)

    // MARK: - view life cycle
    override func viewDidLoad() {
        super.viewDidLoad()

        // Do any additional setup after loading the view.
        setupDisplayImageView()
        setupCoreMLRequest()
        setupBoxesView()
        setupRandomLoadBtn()
    }

    override func viewWillAppear(_ animated: Bool) {
        super.viewWillAppear(animated)
    }

    // MARK: - init
    fileprivate func setupDisplayImageView() {
        view.addSubview(displayImageView)
        displayImageView.contentMode = .scaleAspectFit
        displayImageView.snp.makeConstraints { make in
            make.center.equalTo(view.snp.center)
        }
    }

    fileprivate func setupCoreMLRequest() {
        guard let model = try? PipeObjectDetector(configuration: MLModelConfiguration()).model,
              let visionModel = try? VNCoreMLModel(for: model) else {
            return
        }

        coreMLRequest = VNCoreMLRequest(model: visionModel, completionHandler: { [weak self] (request, error) in
            self?.handleVMRequestDidComplete(request, error: error)
        })
        coreMLRequest?.imageCropAndScaleOption = .centerCrop
    }

    fileprivate func setupBoxesView() {
        let drawingBoxesView = DrawingBoxesView()
        drawingBoxesView.frame = displayImageView.frame
        displayImageView.addSubview(drawingBoxesView)
        drawingBoxesView.snp.makeConstraints { make in
            make.edges.equalToSuperview()
        }

        self.drawingBoxesView = drawingBoxesView
    }

    fileprivate func setupRandomLoadBtn() {
        randomLoadBtn.setTitle("Load a random image", for: .normal)
        randomLoadBtn.setTitleColor(UIColor.blue, for: .normal)
        view.addSubview(randomLoadBtn)
        let screenW = UIScreen.main.bounds.width
        let screeH = UIScreen.main.bounds.height
        let btnH = 52.0
        let btnW = 200.0
        randomLoadBtn.frame = CGRect(x: (screenW - btnW) / 2.0, y: screeH - btnH - 10.0, width: btnW, height: btnH)

        randomLoadBtn.addTarget(self, action: #selector(handleRandomLoad), for: .touchUpInside)
    }

    // MARK: - utils


    // MARK: - action
    fileprivate func handleVMRequestDidComplete(_ request: VNRequest, error: Error?) {
        let results = request.results as? [VNRecognizedObjectObservation]
        DispatchQueue.main.async {
            if let prediction = results?.first {
                self.drawingBoxesView?.drawBox(with: [prediction])
            } else {
                self.drawingBoxesView?.removeBox()
            }
        }
    }

    @objc fileprivate func handleRandomLoad() {
        let imageName = randomImageName()
        if let image = UIImage(named: imageName),
            let cgImage = image.cgImage,
            let request = coreMLRequest {
            displayImageView.image = image
            let handler = VNImageRequestHandler(cgImage: cgImage)
            try? handler.perform([request])
        }
    }

    // MARK: - other
    fileprivate func randomImageName() -> String {
        let maxNum: UInt32 = 18
        let minNum: UInt32 = 1
        let randomNum = arc4random_uniform(maxNum - minNum) + minNum
        let imageName = "images-\(randomNum).jpeg"
        return imageName
    }
}
The final effect is as follows; the complete code has been placed on GitHub: CreateMLDemo

Summary#
This article introduces the overall process of CreateML, from model annotation to training and generating models, and then to using the models. I hope everyone can have a general understanding of CreateML. Later, I will study whether the models imported into the project can be updated, how to update them, and try to create my own SMS filtering app.
References#
- Create ML
- Creating an Object Detection Machine Learning Model with Create ML
- Object Detection with Create ML: images and dataset
- Object Detection with Create ML: training and demo app
- On-device training with Core ML – part 1
- Core ML Explained: Apple's Machine Learning Framework
- A Gentle Introduction to Object Recognition With Deep Learning
- Turi Create