IconFont の使用#
github リンク#
背景: 最近デザインからの要求で、切り取りに IconFont を使用#
最初に、IconFont の使用を調べた後、TBCityIconFont を選択しましたが、使用してみると画像のサポートがあまり良くなく、縦横比が異なる画像は表示時に切り取られてしまい、具体的な実装でも修正する場所が見つかりませんでした。
それで、別の Swift の Iconic というサードパーティライブラリに切り替えました。このライブラリの利点は、.ttf ファイル内のアイコンを自動的に列挙体に生成できるため、使用時に非常に便利です。しかし、欠点はインストールが面倒で、以前は少し面倒でしたが、最近は特に面倒になり、FONT_PATH を設定する必要があります。また、最新の Swift バージョンをサポートしておらず、.ttf フォントファイルを更新するたびに変更が必要です。
我慢できず、今日は自分で(コピーして)作成しました。😄興味がある方は参考リンクをご覧ください。実際には、参考リンクの内容を統合したものです。
実装#
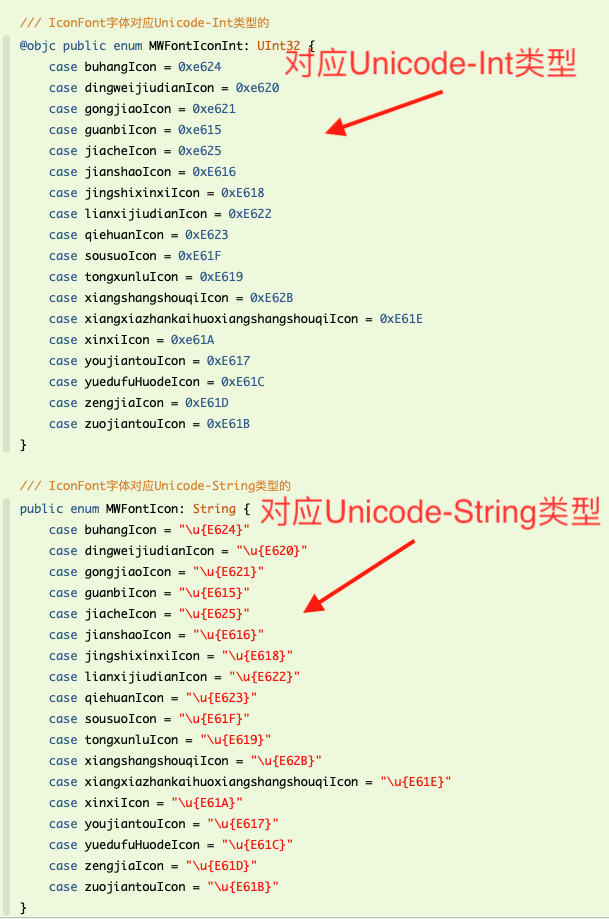
まず、私が求めているのは、Int 型(例:0xe654)または文字列型(例:\u {E61A)を受け入れることです。そして、ローカルファイルの場合、手動で unicode コードを入力せずに済むことを望んでいます。最後に、画像が縦横比の異なる表示をサポートすることです。
全体の原理はWorking with icon fonts in iOS. Code example in Swift 3.とgithub Iconicの組み合わせです。
-
まず、受け入れる型のサポートとして、Int を受け入れるメソッドと String を受け入れるメソッドを定義し、次に Int->String のメソッドを実装し、String に基づいて具体的な内容を実装します。
-
ローカルファイルに毎回 unicode を入力するのは不便なので、二つの列挙型を定義します。一つは enum string、もう一つは enum UInt32 で、UInt32 は OC との互換性を持たせるためです。純粋な Swift の場合は enum String だけで済みます。
-
画像の縦横比の異なる表示:重要なコードは以下の通りです。
...xxx
        var rect = CGRect(origin: CGPoint.zero, size: size)
        rect.origin.y -= edgeInsets.top
        rect.size.width -= edgeInsets.left + edgeInsets.right // 演算子の優先順位に注意
        rect.size.height -= edgeInsets.top + edgeInsets.bottom

...xxx
使用#
-
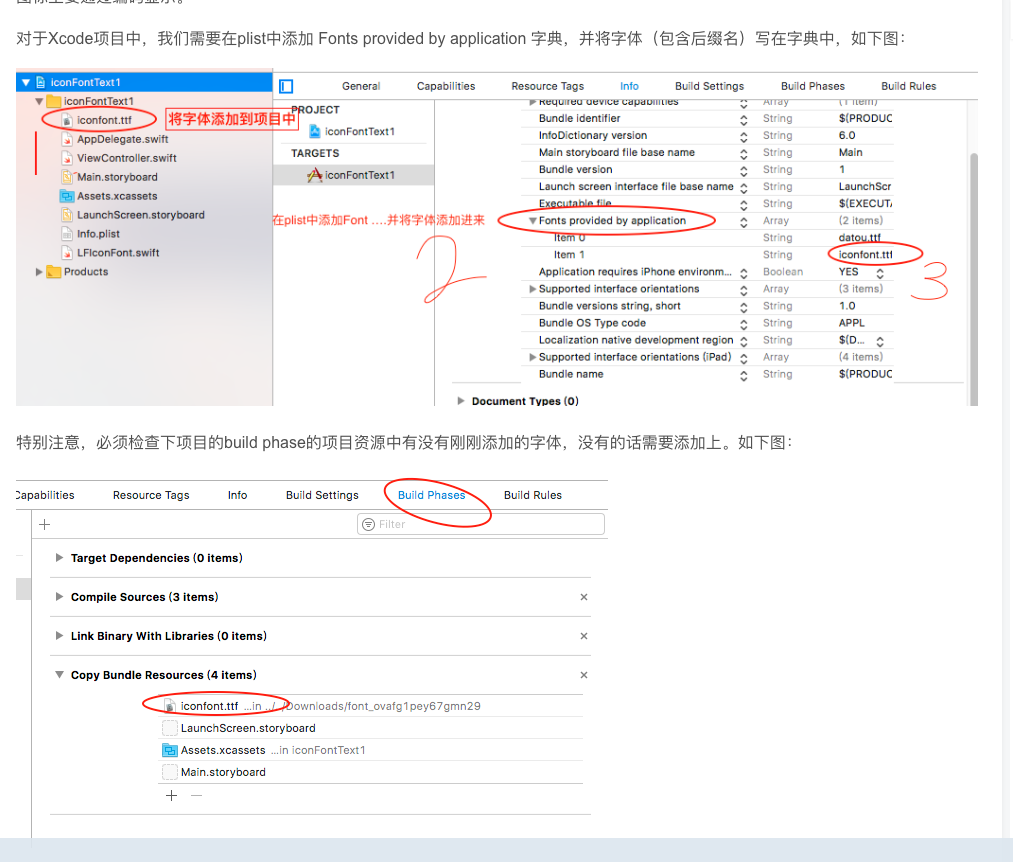
MWIconFont.Swift をプロジェクトに追加します。
-
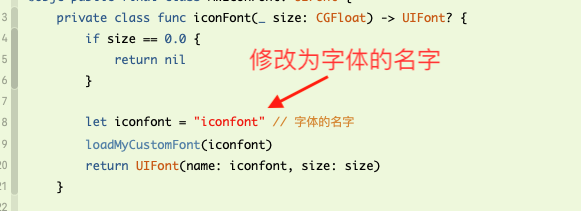
ファイル内の二つの場所を修正します。
- 使用
Swift ラベルを使用して、attributeString を生成します。
        // 列挙体Strを使用
        let attributeStr = MWIconFont.attributedString(fromIconStr: MWFontIcon.yuedufuHuodeIcon.rawValue, size: 50.0, color: UIColor.red)
        displayLabel.attributedText = attributeStr

        // 列挙体Intを使用
        let attributeStr1 = MWIconFont.attributedString(fromIconInt: MWFontIconInt.yuedufuHuodeIcon.rawValue, size: 50.0, color: UIColor.blue)
        displayLabel.attributedText = attributeStr1
OC ラベルを使用して、attributeString を生成します。
NSMutableString *jiantouStr = [MWIconFont attributedStringFromIconInt:MWFontIconIntZuojiantouIcon size:CGSizeMake(19.0, 19.0) color:[UIColor redColor]];
Swift で画像を生成します。
        // 列挙体Strを使用
        let image =  MWIconFont.image(fromIconStr: MWFontIcon.yuedufuHuodeIcon.rawValue, size: CGSize(width: 30.0, height: 50.0), color: UIColor.cyan, edgeInsets: UIEdgeInsets(top: 0.0, left: 0.0, bottom: 0.0, right: -10.0))
        displayImageView.image = image

        // 列挙体Intを使用
        let image1 = MWIconFont.image(fromIconInt: MWFontIconInt.yuedufuHuodeIcon.rawValue, size: CGSize(width: 30.0, height: 50.0), color: UIColor.blue, edgeInsets:  UIEdgeInsets(top: 0.0, left: 0.0, bottom: 0.0, right: -10.0))
        displayImageView.image = image1
OC で画像を生成します。
UIImage *backIcon = [MWIconFont imageFromIconInt:MWFontIconIntZuojiantouIcon size:CGSizeMake(19.0, 19.0) color:[UIColor redColor]];